CrossConnect for ARM Installation Guide
This document contains the following sections:
Installing CrossConnect for ARM on Windows
This section contains instructions for installing your CrossConnect for ARM hardware under Windows.
System Requirements
- CrossWorks for ARM version 1.5 or later
- A PC with a USB interface
- One of the following versions of Windows:
- Windows 11
- Windows 10
- Windows 8
- Windows 7
- Windows Server 2008
- Windows Vista
- Windows Server 2003
- Windows XP
- Windows 2000
Installing CrossConnect for ARM Software on Windows 11
- Download and unzip the CrossConnect Windows device driver from https://www.rowley.co.uk/arm/CrossConnect.htm
- Open the Windows device manager.
- Attach the CrossConnect device to your PC.
- Right click on the CrossConnect entry in the device manager and select Update driver.
- Select Browse my computer for driver software.
- Click Browse and set the location to the directory you unzipped the CrossConnect driver to.
- Click Next to install the device driver.
Installing CrossConnect for ARM Software from a CD/DVD ROM (Windows versions prior to Windows 10)
- Put the CrossConnect for ARM installation disk into the drive.
- Attach the CrossConnect's USB connector to your PC, upon successful connection the power LED will illuminate and Windows will prompt you that it has found new hardware.
-
From the Found New Hardware Wizard select Install the software automatically and then click Next.

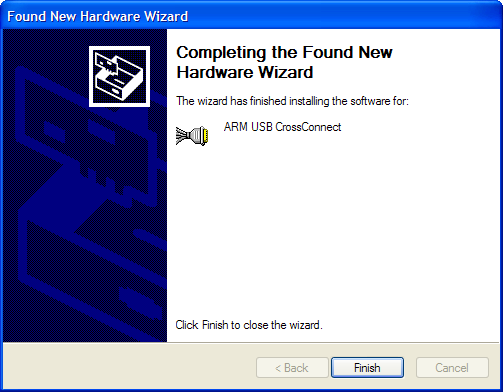
-
Windows will now install the CrossConnect for ARM software. When the installation is complete you will be prompted. Click Finish to close the wizard.
Installing a Downloaded Version of the CrossConnect for ARM Software (Windows versions prior to Windows 10)
- Download and unzip the CrossConnect for ARM software.
- Attach the CrossConnect's USB connector to your PC, upon successful connection the power LED will illuminate and Windows will prompt you that it has found new hardware.
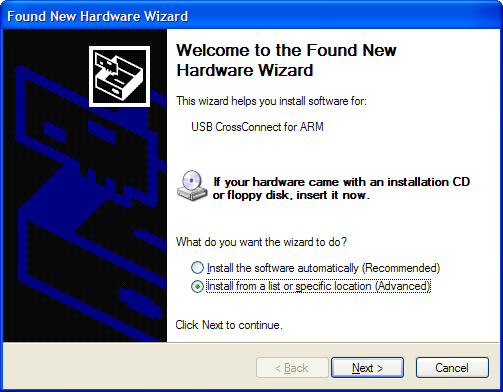
-
From the Found New Hardware Wizard select Install from a list or specific location and then click Next.
-
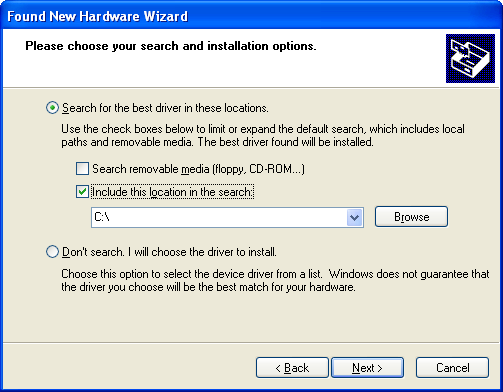
Select Search for the best driver in these locations, check the Include this location in the search option, select the directory that you unzipped the CrossConnect for ARM software into using Browse and then click Next.
-
Windows will now install the CrossConnect for ARM software. When the installation is complete you will be prompted. Click Finish to close the wizard.
Installing CrossConnect for ARM on Linux
This section contains instructions for installing your CrossConnect for ARM hardware under Linux.
System Requirements
- CrossWorks for ARM version 1.5 or later
- A PC with a USB interface
- Linux Kernel version 2.4.20 or later
- Libusb 0.1.10a or later
Installing CrossConnect for ARM Software
As libusb is used to communicate with the CrossConnect, no additional driver installation is required.
If you need to install libusb, download the latest version from http://libusb.sourceforge.net and install it into the /lib directory.
Regular users generally do not by default have USB access permission. Accessing a USB device with insufficient access permission usually results in a Cannot set USB configuration or Cannot claim USB interface error message when using CrossWorks.
Depending on which Linux distribution you use, there are a number of different ways of granting regular users USB access permission.
On Ubuntu 12.04, Linux Mint 14, openSUSE 12.2 and Fedora 17
You need to create a file in /etc/udev/rules.d (e.g. 60-crossconnect.rules) with the following contents:
SUBSYSTEMS=="usb", ATTRS{idVendor}=="131b", ATTRS{idProduct}=="0003", MODE="0666"
SUBSYSTEMS=="usb", ATTRS{idVendor}=="131b", ATTRS{idProduct}=="0004", MODE="0666"
On Ubuntu 8.10 to 10.04, openSUSE 10.3 and Fedora 8
You need to create a file in /etc/udev/rules.d (e.g. 60-crossconnect.rules) with the following contents:
SUBSYSTEM=="usb", ACTION=="add", ENV{DEVTYPE}=="usb_device", \
SYSFS{idVendor}=="131b", SYSFS{idProduct}=="0003", MODE="0666"
SUBSYSTEM=="usb", ACTION=="add", ENV{DEVTYPE}=="usb_device", \
SYSFS{idVendor}=="131b", SYSFS{idProduct}=="0004", MODE="0666"
On Ubuntu 6.06 and Ubuntu 7.10
You need to create a file in /etc/udev/rules.d (e.g. 60-crossconnect.rules) with the following contents:
SUBSYSTEM=="usb_device", SYSFS{idVendor}=="131b", SYSFS{idProduct}=="0003", \
ACTION=="add" MODE="0666"
SUBSYSTEM=="usb_device", SYSFS{idVendor}=="131b", SYSFS{idProduct}=="0004", \
ACTION=="add" MODE="0666"
On RedHat 9.0
You need to add the following lines to the /etc/hotplug/usb.usermap file:
crossconnect 0x0003 0x131B 0x0003 0x0 0x0 0x0 0x0 0x0 0x0 0x0 0x0 0x0
crossconnect 0x0003 0x131B 0x0004 0x0 0x0 0x0 0x0 0x0 0x0 0x0 0x0 0x0
And create the script file /etc/hotplug/usb/crossconnect which contains:
#!/bin/bash
if [ "${ACTION}" = "add" ] && [ -f "${DEVICE}" ]; then
  chmod a+rw "${DEVICE}"
fi
Consult the USB documentation for your specific Linux distribution for more information.
Frequently Asked Questions
Why am I getting a 'The RTCK signal is not responding, disable "Active Clocking" mode' error message?
Why am I getting a 'Target not responding message'?
- Incorrect ARM debug interface type - Check that the Target | ARM Debug Interface project property matches the type of target you are trying to connect to.
- JTAG clock frequency too high for target - Reduce the JTAG clock frequency by increasing the JTAG Clock Divider target property or enabling active clocking by setting the Adaptive Clocking target property to Yes.
What do I have to do to achieve maximum download speed?
- Disable JTAG clock division by setting the JTAG Clock Divider target property to None.
- Disable adaptive clocking by setting the Adaptive Clocking target property to No.
Why do I get a "CrossConnect not running ARM version of firmware" error message when I connect?
You will get this error message if you are using a version of CrossWorks for ARM prior to 1.5. Make sure you are using CrossWorks for ARM 1.5 or later.